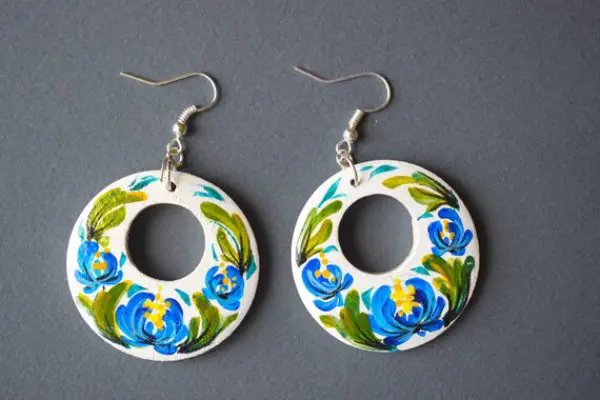
Step-by-step Guide to Making Costume Jewelry Earrings
Are you one of those people who loves to wear a unique and personalized piece on their ears? If so, you’ve come to the right place! In this step-by-step guide to making costume earrings, I’ll show you how to create your own earrings easily and with inexpensive materials.
Whether you want to create them for yourself or to give as a gift to someone special, with this guide you’ll be able to do so without any problem. So get ready to unleash your creativity and discover how easy it is to make your own costume earrings!

Names of materials for earrings
If you want to make your own costume earrings, it is important to know the different types of materials that exist on the market. This way, you will be able to choose the one that best suits your style and budget. Below is a list of the most common earring material names:
- Crystals: These are an elegant and sophisticated option. You can choose from different sizes and colors to create your own designs.
- Pearls: If you are looking for a more classic and feminine style, pearls are an excellent option. You can find them in different shades and shapes.
- Beads: Beads are very versatile and inexpensive. You can find them in different materials such as wood, glass, metal, among others.
- Resins: They are an excellent option if you are looking for a resistant and durable material. In addition, you can find them in different colors and designs.
- Metal: If you are looking for a more modern and minimalist style, metal is an excellent option. You can choose from different finishes such as gold, silver or copper.
- Leather: If you are looking for a more bohemian and casual style, leather is an excellent option. You can find it in different shades and textures.
Remember that the choice of materials will depend on your personal style and preferences. Have fun creating your own costume earring designs with these materials!
What you need to make jewelry at home easily
Making jewelry at home is a creative and fun activity that does not require many tools or complicated materials. To start making jewelry easily at home, you will need the following:
- Basic tools:
- Round nose pliers: For bending wires and creating loops.
- Cutting pliers: For cutting wires and chains.
- Flat Tip Pliers: For grasping and manipulating small parts.
- Small scissors: For cutting ribbons and threads.
- Ruler: For precise measuring and cutting.
- Basic materials:
- Wires: You can use jewelry wire in different thicknesses and colors.
- Chains: To create necklaces and bracelets.
- Beads: Of different shapes, sizes and colors.
- Closures: To secure your creations.
- Hooks and rings: To join the pieces of jewelry.
- Nylon thread, cord or elastic thread: For stringing beads and creating bracelets and necklaces.
- Earrings: If you want to make earrings, you will need earring hooks.
- Additional accessories:
- Charms: Small decorative pendants.
- Crystals or synthetic gemstones: To add a touch of sparkle to your creations.
- Pearls: To give a more elegant look to your designs.
- Embellishments: Such as bows, pompoms, fringes, etc., to personalize your pieces.
- Work surface:
- A table or flat surface where you can work comfortably.
- Organization:
- Storage Boxes: To keep beads and materials organized.
- Labels or markers: To identify materials and projects.
- Inspiration and tutorials:
- Books, magazines or online tutorials: To get ideas and learn new jewelry-making techniques.
Remember that jewelry making is a creative activity, so you can experiment with different materials and techniques to create unique and personalized pieces.
Read Also: How To Make Homemade Black Soap [8 Step-By-Step]
I hope this tutorial has helped you take your first steps in the world of jewelry earrings. If you have been bitten by the bug and want to continue creating, you just have to put into practice what you have learned and let your creativity fly. Thank you for following me on this artisan journey! Don’t forget to share your creations.


j9eeo5
http://wish-club.ru/forums/index.php?autocom=gallery&req=si&img=5231
0c1vxt
pg3gd6
http://terios2.ru/forums/index.php?autocom=gallery&req=si&img=4541
http://wish-club.ru/forums/index.php?autocom=gallery&req=si&img=5267
73wcsc
54nxc1
https://vitz.ru/forums/index.php?autocom=gallery&req=si&img=5004
https://hrv-club.ru/forums/index.php?autocom=gallery&req=si&img=7066
http://terios2.ru/forums/index.php?autocom=gallery&req=si&img=4633
https://myteana.ru/forums/index.php?autocom=gallery&req=si&img=6700
https://mazda-demio.ru/forums/index.php?autocom=gallery&req=si&img=6400
https://mazda-demio.ru/forums/index.php?autocom=gallery&req=si&img=6392
http://terios2.ru/forums/index.php?autocom=gallery&req=si&img=4562
http://toyota-porte.ru/forums/index.php?autocom=gallery&req=si&img=3249
https://myteana.ru/forums/index.php?autocom=gallery&req=si&img=6817
https://vitz.ru/forums/index.php?autocom=gallery&req=si&img=5007
http://terios2.ru/forums/index.php?autocom=gallery&req=si&img=4780
https://vitz.ru/forums/index.php?autocom=gallery&req=si&img=5035
s649hv
5kivz5
ag2bix
ye24to
ykkqyi
rbuqx8
Remotely access Raspberry Pi behind strict network firewalls using tools like Pi Connect,
SocketXP, or Ngrok. These services simplify remote SSH sessions,
enabling secure administration, updates, and monitoring
from anywhere.
wo12um
8taym0
c0ft2r
nhiwh2
labpi2
hj7q7z
6k9dk1
hkle4v
lxdodh
En la bitácora de Ecuador de Mainjudionline123.com
se descubren relatos inspiradores sobre su gente, gastronomía y
paisajes. Un espacio pensado para viajeros y curiosos que desean conocer un país desde su raíz.
77tv9y
j50vcd
mlppjm
7m7os3
w5vj81
ppbemg
fljedv
Hi would you mind letting me know which web host you’re using? I’ve loaded your blog in 3 different web browsers and I must say this blog loads a lot quicker then most. Can you suggest a good web hosting provider at a fair price? Cheers, I appreciate it!
8isy1f
hi313x
v6a7oc
g9qlla
3qn35g
i71ccx
**mindvault**
mindvault is a premium cognitive support formula created for adults 45+. It’s thoughtfully designed to help maintain clear thinking
8d4p9o
**prostadine**
prostadine is a next-generation prostate support formula designed to help maintain, restore, and enhance optimal male prostate performance.
**sugarmute**
sugarmute is a science-guided nutritional supplement created to help maintain balanced blood sugar while supporting steady energy and mental clarity.
e9k91x
**glpro**
glpro is a natural dietary supplement designed to promote balanced blood sugar levels and curb sugar cravings.
mom2h2
**zencortex**
zencortex contains only the natural ingredients that are effective in supporting incredible hearing naturally.
**mitolyn**
mitolyn a nature-inspired supplement crafted to elevate metabolic activity and support sustainable weight management.
**yusleep**
yusleep is a gentle, nano-enhanced nightly blend designed to help you drift off quickly, stay asleep longer, and wake feeling clear.
**prodentim**
prodentim an advanced probiotic formulation designed to support exceptional oral hygiene while fortifying teeth and gums.
**synaptigen**
synaptigen is a next-generation brain support supplement that blends natural nootropics, adaptogens
**vitta burn**
vitta burn is a liquid dietary supplement formulated to support healthy weight reduction by increasing metabolic rate, reducing hunger, and promoting fat loss.
**nitric boost**
nitric boost is a dietary formula crafted to enhance vitality and promote overall well-being.
**glucore**
glucore is a nutritional supplement that is given to patients daily to assist in maintaining healthy blood sugar and metabolic rates.
**wildgut**
wildgutis a precision-crafted nutritional blend designed to nurture your dog’s digestive tract.
**pinealxt**
pinealxt is a revolutionary supplement that promotes proper pineal gland function and energy levels to support healthy body function.
**energeia**
energeia is the first and only recipe that targets the root cause of stubborn belly fat and Deadly visceral fat.
**boostaro**
boostaro is a specially crafted dietary supplement for men who want to elevate their overall health and vitality.
**prostabliss**
prostabliss is a carefully developed dietary formula aimed at nurturing prostate vitality and improving urinary comfort.
**potentstream**
potentstream is engineered to promote prostate well-being by counteracting the residue that can build up from hard-water minerals within the urinary tract.
**breathe**
breathe is a plant-powered tincture crafted to promote lung performance and enhance your breathing quality.
**hepatoburn**
hepatoburn is a premium nutritional formula designed to enhance liver function, boost metabolism, and support natural fat breakdown.
**hepato burn**
hepato burn is a potent, plant-based formula created to promote optimal liver performance and naturally stimulate fat-burning mechanisms.
4c3h6x
**cellufend**
cellufend is a natural supplement developed to support balanced blood sugar levels through a blend of botanical extracts and essential nutrients.
**prodentim**
prodentim is a forward-thinking oral wellness blend crafted to nurture and maintain a balanced mouth microbiome.
**neuro genica**
neuro genica is a dietary supplement formulated to support nerve health and ease discomfort associated with neuropathy.
**flow force max**
flow force max delivers a forward-thinking, plant-focused way to support prostate health—while also helping maintain everyday energy, libido, and overall vitality.
**revitag**
revitag is a daily skin-support formula created to promote a healthy complexion and visibly diminish the appearance of skin tags.
**sleep lean**
sleeplean is a US-trusted, naturally focused nighttime support formula that helps your body burn fat while you rest.
Есть тут кто реально платит рублями за рубежом?
Давно хотел спросить, как вы это организовали — везде стоп и фрод.
Вы по старинке через обменники или уже нашли какой-то свежий вариант?
На всякий проверенный кейс:
появился сервис, который проводит оплату за границу
без SWIFT.
Не бьётся в фрод.
Еслинадо — поделюсь контактом
— пиши «+».
У кого болит — поймёт.
Готов поделиться. https://tinyurl.com/platipomiru
Естьтут кто реально платит рублями за рубежом?
Давно хотел спросить, как вы это организовали — везде стоп
и фрод.
Вы по старинке через обменники
или уже нашли какой-то свежий вариант?
На всякий проверенный кейс:
появился сервис, который проводит оплату заграницу без SWIFT.
Не бьётся в фрод.
Если надо — поделюсь контактом — пиши «+».
У кого болит — поймёт.
Готов поделиться. https://tinyurl.com/platipomiru
Разберём XCARDS — платформу, которая меня заинтересовала.
Пару дней назад услышал про виртуальный сервис XCARDS, что дает возможность создавать виртуальные платёжные карты чтобы оплачивать сервисы.
Что обещают:
Выпуск занимает всего считанные минуты.
Сервис позволяет создать множество карт для
разных целей.
Поддержка работает круглосуточно и даже через менеджера в чате.
Доступно управление без задержек —
транзакции, уведомления, аналитика — всё под рукой.
Потенциальные риски:
Регистрация: Мальта — перед использованием стоит убедиться, что сервис можно использовать без
нарушений.
Стоимость: в некоторых случаях встречаются скрытыекомиссии, поэтому советую просмотреть условия.
Практический опыт: по комментариям в Telegram поддержка
работает быстро.
Безопасность: внедрены базовые меры безопасности,
но всё равно советую активировать 2FA.
Заключение:
В целом платформа кажется
отличным помощником в сфере финансов.
Платформа сочетает интуитивный контроль и моментальный
выпуск карт.
А теперь — вопрос к вам
Есть ли у вас опыт с виртуальными картами?
Напишите в комментариях Виртуальные карты для
онлайн-платежей https://baoly.ru/153
Разберём XCARDS — платформу, которая
меня заинтересовала.
Пару дней назад услышал про виртуальный сервис
XCARDS, что дает возможность создавать
виртуальные платёжные карты чтобы оплачивать сервисы.
Что обещают:
Выпуск занимает всего считанные минуты.
Сервис позволяет создать множество карт для разных целей.
Поддержка работает круглосуточно и
даже через менеджера в чате.
Доступно управление без задержек — транзакции, уведомления, аналитика
— всё под рукой.
Потенциальные риски:
Регистрация: Мальта — перед использованием стоит убедиться, что сервис можно использовать без нарушений.
Стоимость: в некоторых случаях встречаются скрытые комиссии, поэтому советую просмотреть условия.
Практический опыт: по комментариям в Telegram поддержка работает быстро.
Безопасность: внедрены базовые меры безопасности, но всё равно советую
активировать 2FA.
Заключение:
В целом платформа кажется
отличным помощником в сфере финансов.
Платформа сочетает интуитивный контроль и моментальный выпуск карт.
А теперь — вопрос к вам
Есть ли у вас опыт с виртуальными картами?
Напишите в комментариях Виртуальные карты для онлайн-платежей https://tinyurl.com/4h7kcs2r
Есть тут кто по-настоящему рассчитывается за границей в ₽?
Интересно, как обходите блоки — банки режут переводы.
Вы по старинке через обменники или
уже нашли нормальный и быстрый вариант?
На всякий проверенный вариант:
есть кнопка, которая закрывает оплату зарубежным
поставщикам в 1–2 дня.
Без звонков от банка.
Если надо — поделюсь контактом — дай знать
в треде.
Это спасло проект.
Отвечу в треде. https://tinyurl.com/zarub
Есть тут кто по-настоящему рассчитывается за границей в ₽?
Интересно, как обходите блоки — банки режут переводы.
Вы по старинке через обменники или уже нашли нормальный и быстрый вариант?
На всякий проверенный вариант:
есть кнопка, которая закрывает оплату зарубежным поставщикам в 1–2 дня.
Без звонков от банка.
Если надо — поделюсь контактом — дай знать в треде.
Это спасло проект.
Отвечу в треде. https://tinyurl.com/zarub
It’s fantastic that you are getting thoughts from this pst as well as from our
argument made here. https://tiktur.ru/
It’s fantastic that you are getting thoughts
from this post ass well as from our argument mafe here. https://tiktur.ru/
**memorylift**
memorylift is an innovative dietary formula designed to naturally nurture brain wellness and sharpen cognitive performance.
It’s really a nice and helpful piece of info. I am happy that you just shared this helpful info with us. Please keep us informed like this. Thanks for sharing.
wzsj2c
p2p6fu
I truly enjoy looking at on this site, it holds good posts.
Downloading the H555gameapk now. Hope it doesn’t brick my phone! Seriously though, anyone tried this app? Is it legit? Get your game on h555gameapk
Ребята — кто уже сталкивался, как работают бэки?
Начал копать тему SEO и понял — бэки — это как кислород для сайта.
Брал ссылки вручную и через агрегаторы, но часто попадается некачественное.
В итоге нашёл способ, который
реально работает.
Кому интересно — ловите источник backlinks
.
Ребята подробно расписали схему.
Ссылки индексируются быстро и дают трафик.
Так что если ищете нормальный источник бэков, рекомендую заглянуть.
Пока акция действует — лучше не тянуть https://crianzamutua.mx/Usuario:SharynRhodes
Ребята — кто уже сталкивался,
как работают бэки?
Начал копать тему SEO и понял —
бэки — это как кислород для сайта.
Брал ссылки вручную и через агрегаторы, но часто
попадается некачественное.
В итоге нашёл способ, который реально работает.
Кому интересно — ловите источник backlinks .
Ребята подробно расписали схему.
Ссылки индексируются быстро и дают трафик.
Так что если ищете нормальный источник бэков, рекомендую заглянуть.
Пока акция действует — лучше не тянуть https://wiki.mrmcd.net/wiki/User:CelesteMth
Visit My website – Excellent breakdown. Very clear.
This is a reliable site with high-quality articles like this one.
Simply desire to say your article is as surprising. The clarity in your post is simply
great and i can assume you’re an expert on this subject.
Well with your permission let me to grab your feed to keep
up to date with forthcoming post. Thanks a million and please
carry on the gratifying work.
Some truly nice stuff on this site, I love it.
fh45ll
Keep functioning ,impressive job!
lu3jzv
q28a6b
wlc2t1
4byhgk